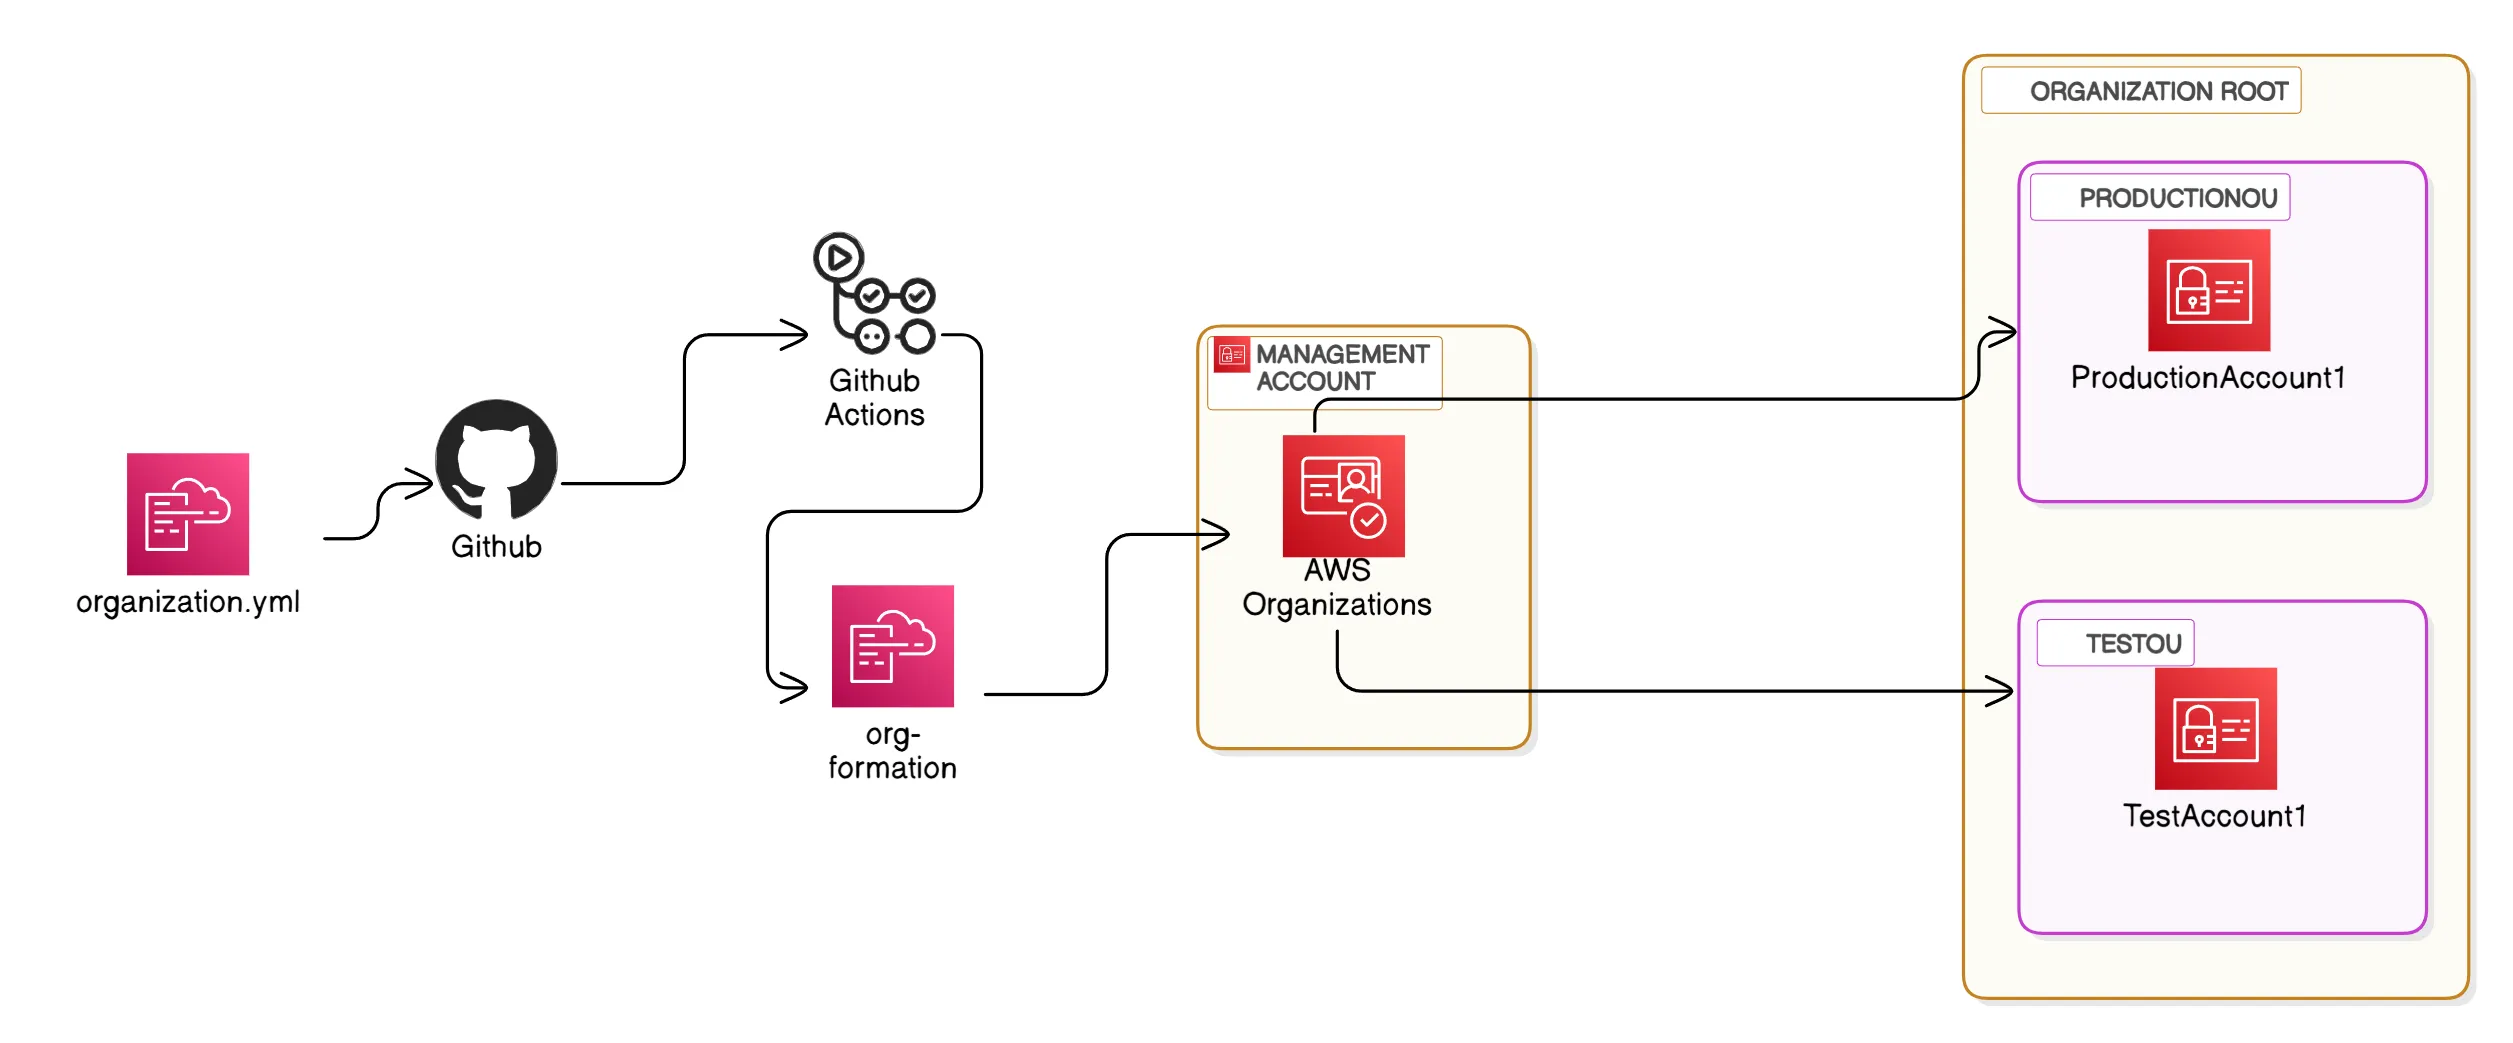
AWS Organizations is a service that helps you centrally manage and govern your environment as you grow and scale your AWS resources. With org-formation, you can create accounts, organize them in hierarchies, apply policies, and automate account creation and management.
AdministratorAccess aws configurenpm install -g aws-organization-formationTo get started with AWS Organizations utilising org-formation, follow these steps:
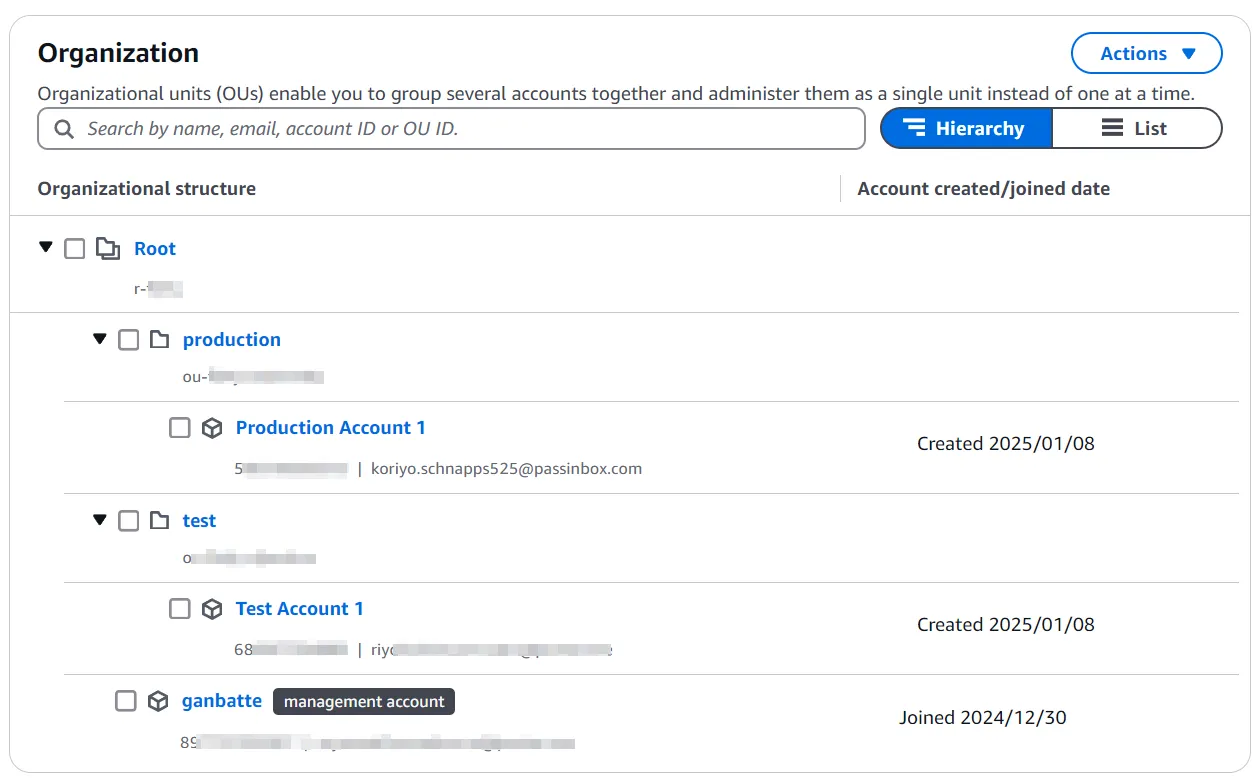
Create an Organization: Set up your organization in the aws-cli (This can also be performed via the AWS console).
aws organizations create-organization --feature-set ALLList Accounts: Check the structure of existing accounts.
aws organizations list-roots
aws organizations list-accounts
Initialise org-formation:
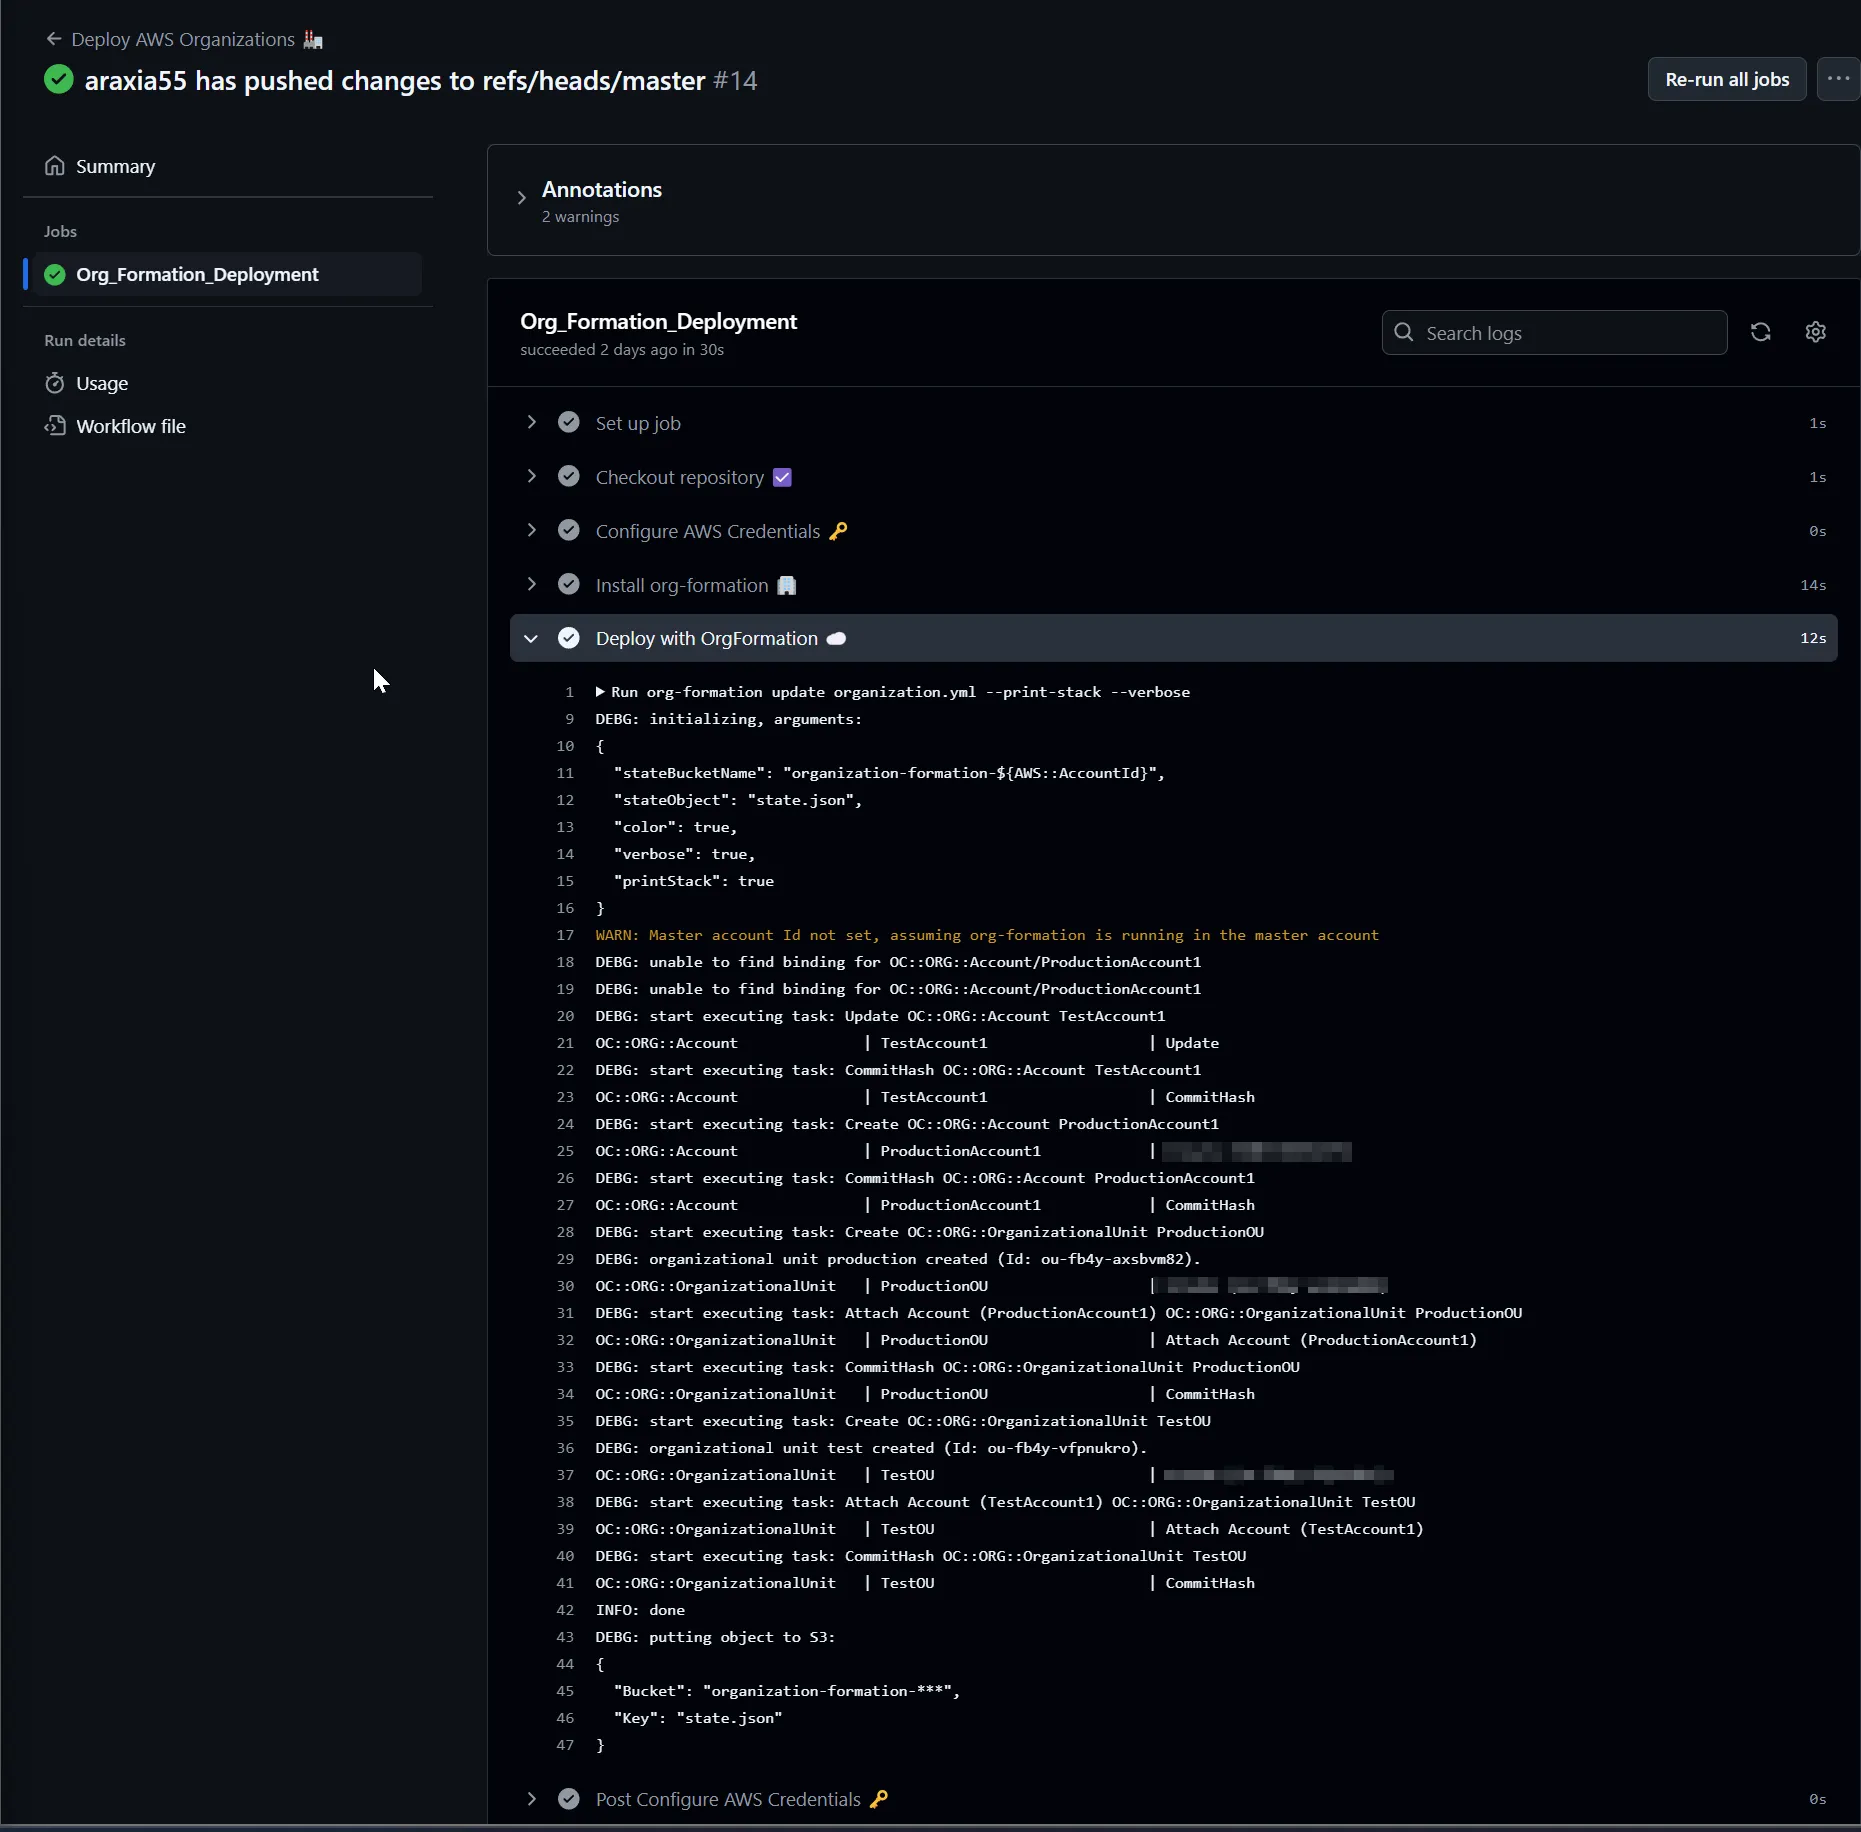
cd aws-organizations && org-formation init organization.ymlValidate Accounts: You may need to check the verification email sent by AWS to the email address indicated as your management account this can be found in the organization.yml file.
Organize and Add Accounts in OU (Organizationl Unit): Add existing accounts or create new ones.
In your code editor include additional OU’s and accounts by modifying the structure of the organization.yml.
Checkout this sample Cloudformation code for organization.yml
Great resource to get the org-formation grips started.
Hide PII (Personal Identifiable Information):
The end goal is to automate the management and deployment of AWS accounts and keep track of user creation, removal, and privileges. Nevertheless, this can be achieved by version controlling the organization.yml file.
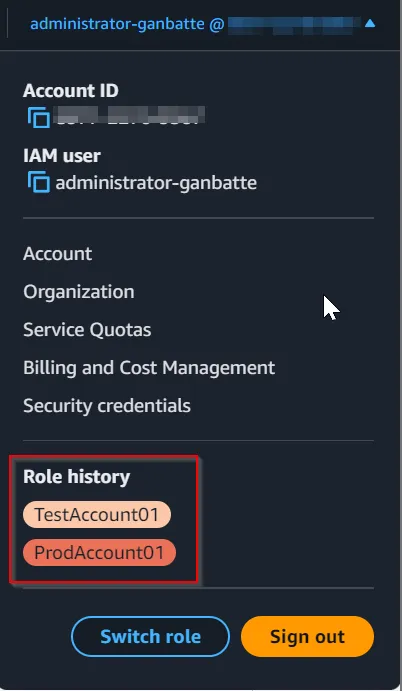
If you want to test the OrganizationAccountAccessRole after successful deployment.
aws organizations list-accounts and check the Id key.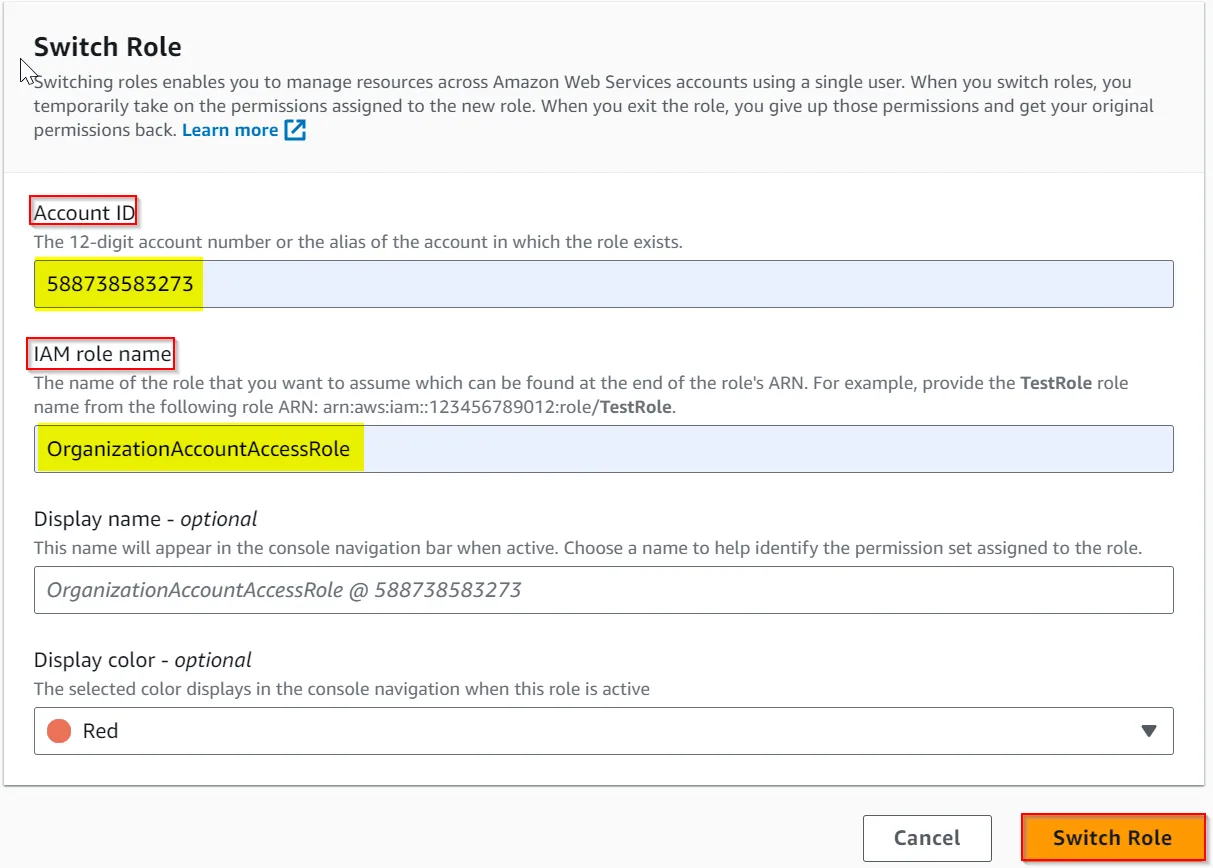
AWS Organizations aims for better data governance, security boundaries, scalability, and cost monitoring. By storing data in different accounts, it’s easier to control who has access to what data and demonstrate compliance with regulations like GDPR. Moving critical resources to separate accounts allows for easier management of IAM permissions and security controls at the account level. Having multiple accounts also helps to avoid service limits issues, as each team can have their own account with its own set of resources. Dividing the system over several accounts also reduces the blast radius, limiting the impact of unwanted side-effects of changes. Additionally, org-formation is a neat tool to version control and keep track of your Identity and Access Management.
Why I didn’t utilise org-formation’s CICD pipeline? (use Github instead)
The command below won’t work if you have a newly created AWS account.
Because this command will create a CodeCommit repository however, AWS have stopped onboarding new customers for CodeCommit starting July 25th, 2024. Checkout this re:Post about AWS’s statement. But if you’ve created an account prior to the cease of CC you can still create a repository and I’ve tested this to work in one of my old accounts.
org-formation init-pipeline